A full system backup image is one of those features many Windows users ignore until something goes wrong.
A few years ago, I was testing a Windows update on a spare workstation. The update appeared to install normally, but after the reboot, the system became stuck in a repair loop. Important development tools, configuration files, and several projects were no longer accessible. Fortunately, I had created a system image backup a few days earlier. Instead of spending hours reinstalling Windows and restoring applications manually, I restored the entire system image and was back to work within an hour.
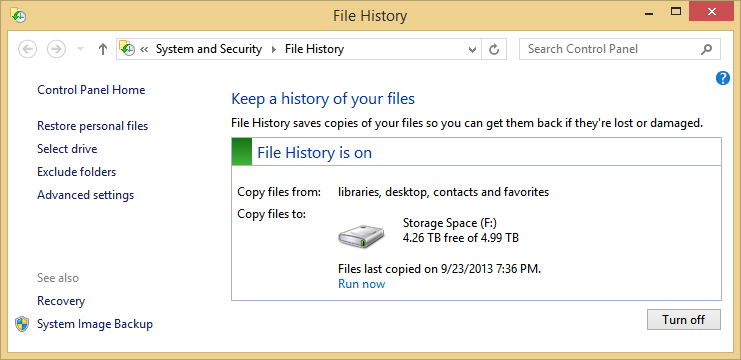
Many users assume they need expensive backup software to protect their computers. In reality, Windows 11 still includes a built-in system image backup feature that can create a complete snapshot of your operating system, applications, settings, and personal files.
This guide explains how to create a full system backup image in Windows 11 using only built-in Microsoft tools.
What Is a System Image Backup?
A system image backup is a complete copy of your Windows installation.
Unlike copying files to an external drive, a system image includes:
- Windows operating system files
- Installed applications
- System settings
- User accounts
- Personal documents
- Drivers
- Boot information
If your computer fails to boot, suffers from disk corruption, or experiences a major software problem, you can restore the image and return the system to the exact state it was in when the backup was created.
When Should You Create a System Image?
Creating a system image is especially useful before:
- Major Windows updates
- Hardware upgrades
- SSD replacements
- Software testing
- Registry modifications
- Large system changes
Many IT professionals create a fresh image every month as part of a regular backup routine.
What You’ll Need
Before starting, prepare the following:
External Storage Device
The backup destination should have enough free space to store the image.
Recommended options:
- External hard drive
- External SSD
- Secondary internal drive
- Network storage location
For most systems, an external drive with at least twice the used space of your Windows drive is recommended.
Administrator Access
You must be logged into an account with administrator privileges.
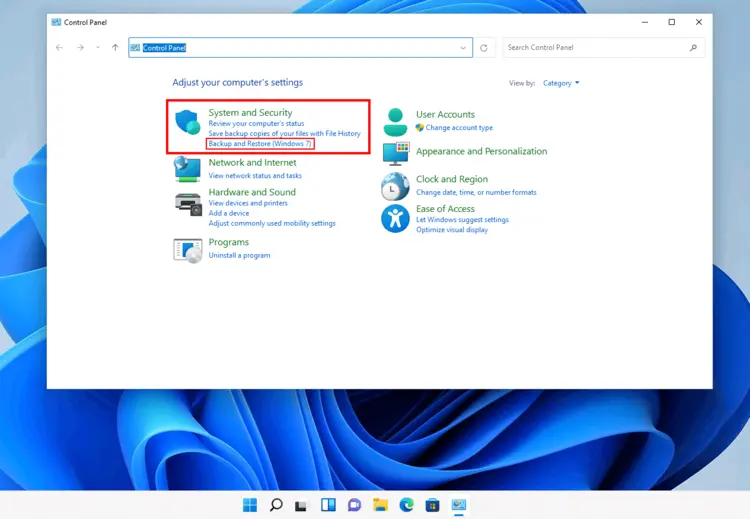
Step 1: Open the Backup and Restore Tool
Although Windows 11 emphasizes newer backup features, the traditional System Image Backup tool is still available.
Open the Start Menu and search for:
Control Panel
Select Control Panel.
Navigate to:
Control Panel > System and Security > Backup and Restore (Windows 7)
Don’t be confused by the name. Microsoft retained this utility for compatibility, and it still works on Windows 11.
Step 2: Start the System Image Wizard
Inside the Backup and Restore window, look at the left-hand menu.
Click:
Create a system image
Windows will begin searching for available backup destinations.
This process may take several seconds depending on your hardware.
Step 3: Choose a Backup Destination
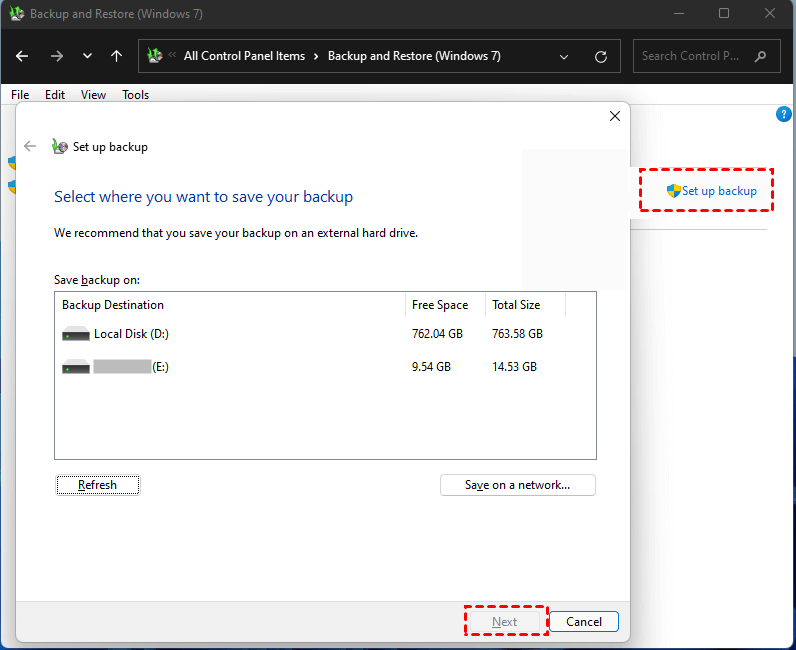
You will now see several storage options.
Option 1: On a Hard Disk
This is the easiest and most common choice.
Select your:
- External USB hard drive
- External SSD
- Secondary internal drive
Option 2: On One or More DVDs
While still supported, this option is rarely practical today because modern Windows installations require multiple discs.
Option 3: On a Network Location
Useful in business environments where backups are stored on a file server or NAS device.
For most home users, an external USB drive is the best option.
Click Next after selecting your destination.
Step 4: Select the Drives to Include
Windows automatically selects the system partitions required for recovery.
Typically this includes:
- EFI System Partition
- Recovery Partition
- Windows (C:) drive
You may also see additional drives available for inclusion.
If you store important data on another partition, consider selecting it as well.
Keep in mind that adding more drives increases backup size and completion time.
Click Next.
Step 5: Review Backup Settings
Windows will display a summary showing:
- Backup destination
- Included drives
- Estimated backup size
Review everything carefully.
If the settings look correct, click:
Start backup
Step 6: Wait for the Backup to Complete
The backup process will begin immediately.
The completion time depends on:
- Drive speed
- System size
- USB connection type
- Amount of data
Typical examples:
| Data Size | Approximate Time |
|---|---|
| 100 GB | 15–30 minutes |
| 250 GB | 30–60 minutes |
| 500 GB | 1–2 hours |
You can continue using the computer during the backup, although performance may be slightly reduced.
Step 7: Create a System Repair Disc (Optional)
After the backup completes, Windows may ask whether you want to create a system repair disc.
Most modern computers no longer include optical drives, so this step is usually skipped.
Instead, create a Windows recovery USB drive.
Search for:
Recovery Drive
Then follow the wizard to create a bootable recovery device.
This can be extremely useful if Windows becomes unbootable later.
How to Verify the Backup Was Created Successfully
Open your backup destination drive.
You should see a folder named:
WindowsImageBackup
Do not rename, move, or modify this folder.
Windows relies on its structure during restoration.
If the folder exists and contains data, the backup was likely created successfully.
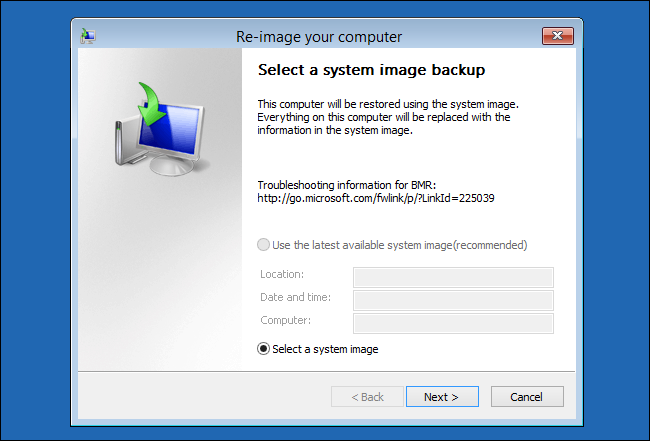
How to Restore a System Image
If Windows becomes unusable, you can restore the image.
Boot into Windows Recovery Environment.
Navigate to:
Troubleshoot > Advanced Options > System Image Recovery
Connect the drive containing your backup.
Windows will automatically search for available system images and guide you through the restoration process.
Be aware that restoring a system image replaces the current system state with the backup version.
Advantages of Using Windows Built-In Backup
There are several reasons many professionals still use Microsoft’s built-in solution.
No Additional Software
No downloads or subscriptions are required.
Full System Protection
The entire operating system can be restored.
Reliable Recovery
The feature has existed in Windows for many years and remains dependable.
Cost Effective
Everything is included with Windows 11.
Common Mistakes and Troubleshooting
Backup Drive Not Appearing
Possible causes include:
- Drive not connected properly
- Unsupported file system
- Drive letter issues
Try reconnecting the drive and reopening the backup wizard.
Not Enough Space Available
System image backups require significant storage.
Delete unnecessary files or use a larger external drive.
Backup Fails Partway Through
Common reasons include:
- Disk errors
- Bad sectors
- Antivirus interference
- Corrupted system files
Run the following commands in an elevated Command Prompt:
sfc /scannow
After completion, run:
DISM /Online /Cleanup-Image /RestoreHealth
Then attempt the backup again.
Windows Cannot Find the Backup During Recovery
Verify that:
- The drive is connected before booting recovery mode
- The WindowsImageBackup folder remains unchanged
- The backup was not moved into another directory
Windows expects the backup folder structure to remain intact.
A system image backup takes a little time to create, but it can save hours—or even days—of recovery work when something goes wrong. Whether you’re a home user protecting personal files or a power user managing multiple applications and settings, creating a backup image is one of the simplest ways to prepare for unexpected system failures.