
When I get a new VPS, my first instinct used to be installing the software I needed. Maybe it was Docker, a web server, or a new application. Security usually came next.
That order creates unnecessary risk.
A newly deployed VPS may already expose SSH to the public internet. Automated scanners constantly probe common ports, including port 22, looking for weak passwords, outdated services, and misconfigured servers. A public IP address does not need to be advertised before bots start testing it.
I once spent around 30 minutes hardening a server manually: editing sshd_config, creating a sudo user, configuring UFW, changing the SSH port, and setting up Fail2ban. The process worked, but it was easy to overlook a setting or make a mistake that could lock me out.
A project called vps-security-hardening aims to automate much of this initial setup with a single command. Its documented workflow covers SSH access, system updates, user permissions, firewall rules, brute-force protection, and configuration checks.
Before using any remote hardening script, though, understand what it changes and prepare a recovery path.
Why You Should Harden a VPS Before Installing Software

Every additional service can create another potential entry point. A web server, database, container runtime, or administration panel may expose ports that you did not intend to make public.
A safer setup starts with a small attack surface:
- Use a non-root account for routine administration.
- Disable root password-based SSH login.
- Prefer SSH key authentication.
- Restrict inbound traffic with a firewall.
- Add protection against repeated login attempts.
- Keep the operating system and installed packages updated.
- Verify the configuration before ending your current SSH session.
Changing the SSH port can reduce noise from basic automated scans, but it is not a replacement for authentication, firewall rules, or timely updates.
Step 1: Prepare Your VPS and Recovery Access
Before running a hardening script, sign in to your VPS provider’s control panel and check what recovery options are available.
Look for a web console, serial console, rescue mode, or another way to access the server if SSH stops working.
Next, identify the following information:
- Your VPS public IP address.
- The current root password, if password authentication is enabled.
- The username you want to create for administration.
- A strong password for that account.
- An unused SSH port, such as
2222. - Whether your VPS provider has a separate network firewall.
Keep your existing SSH session open throughout the migration. Do not close it until you have tested a new connection successfully.
Also check the script’s supported operating systems and prerequisites before proceeding. Firewall tools, SSH configuration paths, and service names can vary across Linux distributions.
Step 2: Open the New SSH Port in Your VPS Provider’s Firewall
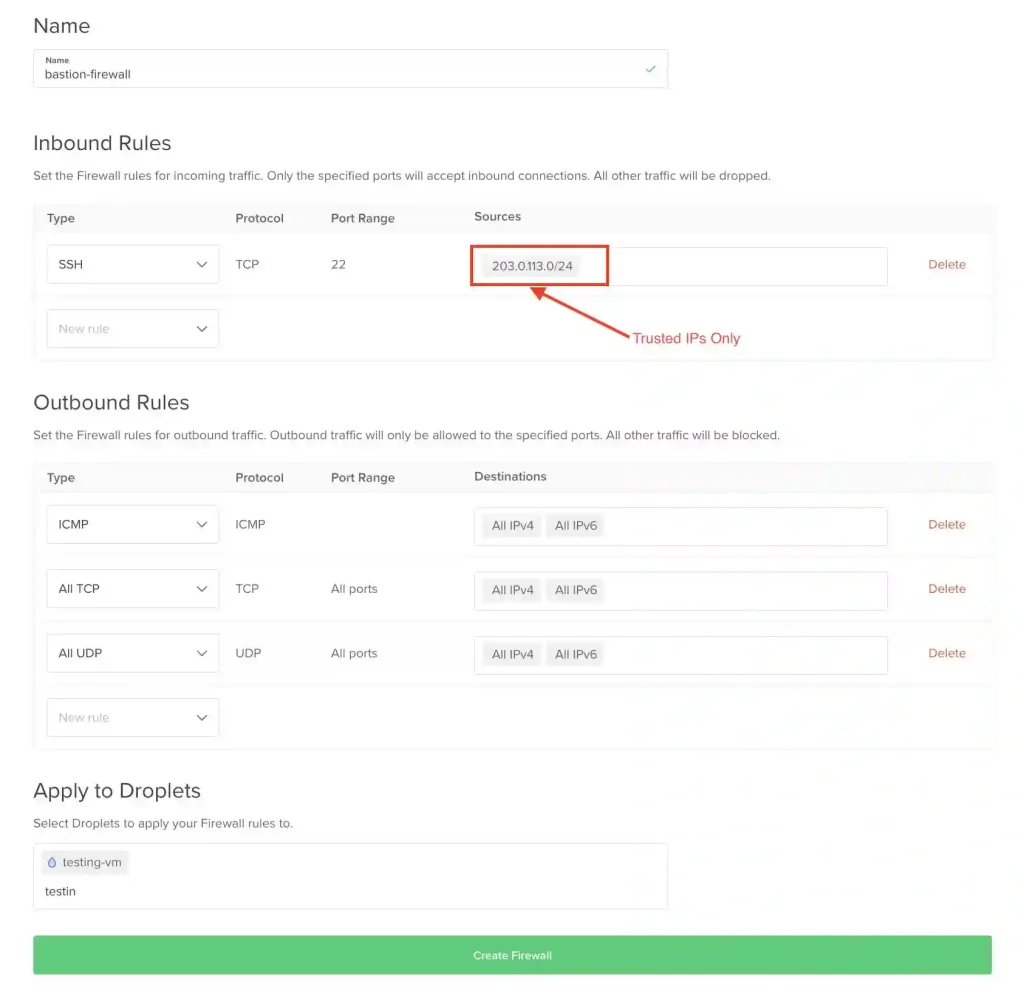
Many VPS providers have two separate firewall layers:
- The provider’s network firewall.
- The firewall running inside Linux, such as UFW.
Both layers must allow your new SSH port.
For example, if you plan to use port 2222, add an inbound TCP rule for that port in your provider’s control panel. Restrict the source IP to your own public IP when practical.
Do this before changing the SSH configuration. Otherwise, the server might accept SSH connections locally while the provider’s firewall blocks them from the internet.
Do not remove the existing port 22 rule yet. Keep it available until the new connection has been tested.
Step 3: Install the Local Prerequisite
The proposed script uses sshpass to provide an SSH password non-interactively. Install it on the computer from which you will run the script, not automatically on the VPS.
On Debian or Ubuntu, use:
sudo apt update
sudo apt install sshpass
On macOS with Homebrew, use:
brew install sshpassOther operating systems may require a different installation method.
Because sshpass handles passwords, avoid saving credentials in shell history, shared scripts, logs, or screenshots. A command-line password argument may be visible to local process-inspection tools, depending on the environment. Use this method only if you trust the machine running it and understand the script’s credential handling.
Step 4: Inspect the Hardening Script Before Running It
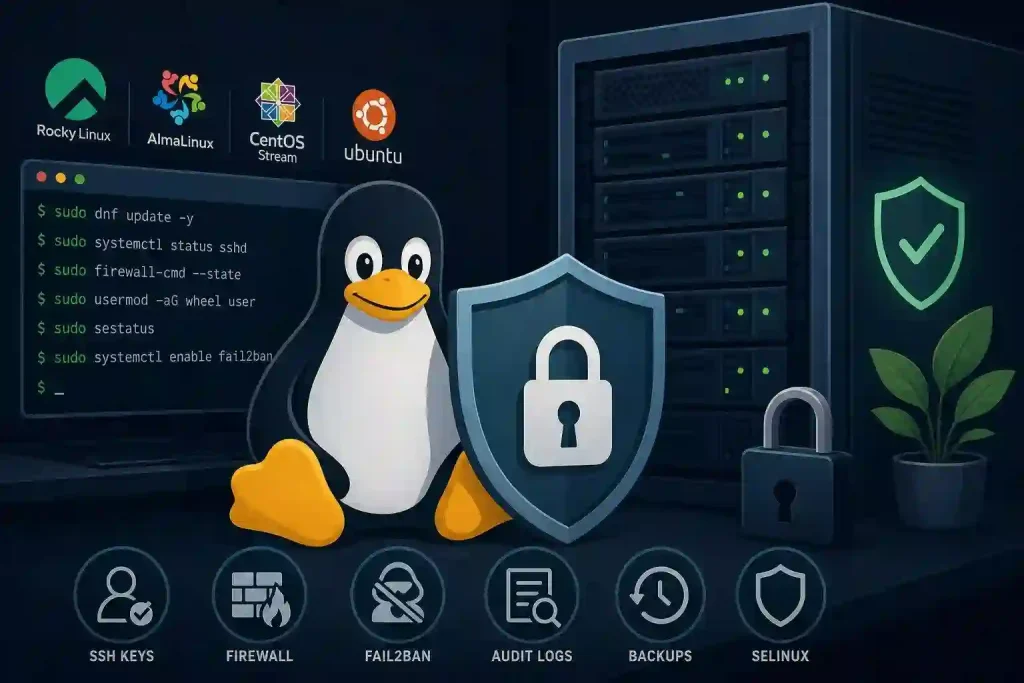
Never run a remote administrative script simply because it promises one-command security.
First, obtain the project from its trusted source and inspect its documentation and shell code. Confirm that it supports your Linux distribution and that you understand its actions.
For a local Git checkout, you can inspect the files with:
git status
find . -maxdepth 3 -type f
Then open the main script in a text editor and review the commands that modify SSH, UFW, Fail2ban, user accounts, and Docker networking.
Check especially for:
- Firewall rules that could block your current connection.
- SSH changes that assume a particular configuration layout.
- Passwords or secrets written to logs.
- Commands that restart services or overwrite existing settings.
- Docker rules that interact with UFW or other firewall tools.
Do not assume that a script is safe merely because it is open source or uses an MIT license. The license describes permissions; it does not certify the code.
Step 5: Run the VPS Hardening Command
The project description provides the following command format:
./scripts/harden-vps.sh \
  --ip <VPS_IP> \
  --root-pass <ROOT_PASSWORD> \
  --user <NEW_USER> \
  --user-pass <NEW_USER_PASSWORD> \
  --port <SSH_PORT>
Replace the placeholders with your actual values. Do not include the angle brackets.
For example, VPS_IP is your server’s public IP, NEW_USER is the administrative username you want to create, and SSH_PORT is the port you prepared in the provider firewall.
Important: This command is based on the supplied project description, not an independently verified execution. Check the repository’s current README and argument handling before running it. If possible, use a safer credential-input method rather than placing passwords directly in the command line.
According to the provided description, the script is intended to automate several tasks:
- Test the initial SSH connection.
- Update system packages.
- Create a new administrative user.
- Restrict root password-based SSH login.
- Change the SSH port and configure key authentication.
- Configure Fail2ban to help block repeated login attempts.
- Configure UFW and remove the old port 22 allowance.
- Adjust Docker-related firewall behavior.
- Run checks on the resulting configuration.
Treat this list as the intended workflow, not proof that every step succeeds on every VPS. Watch the output for errors and read any final summary carefully.
Step 6: Test the New SSH Connection Before Logging Out
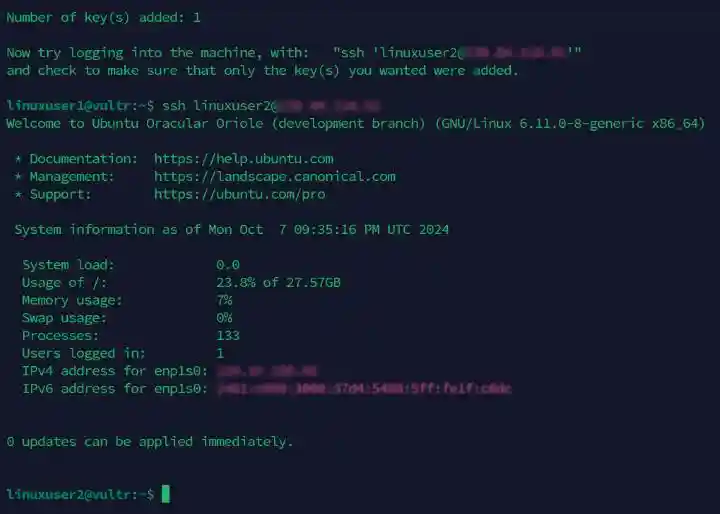
Once the script finishes, open a second terminal window. Keep your original session active.
If the new user uses SSH keys, test the connection with the appropriate private key:
ssh -p 2222 -i ~/.ssh/id_ed25519 your_user@YOUR_VPS_IPReplace the example port, key path, username, and IP with your actual settings.
If the connection fails, check the provider firewall, Linux firewall, SSH service status, configured port, and authentication settings using your existing session or the provider console.
After connecting, confirm that the new user has the intended administrative privileges. On a sudo-based system, you can test with:
sudo -v
sudo whoami
The second command should return root when sudo authorization works correctly. This does not mean you should use root for everyday tasks; it confirms that the administrative account can elevate privileges when necessary.
Only close the original session after the new login and administrative access both work.
Step 7: Verify the Security Configuration
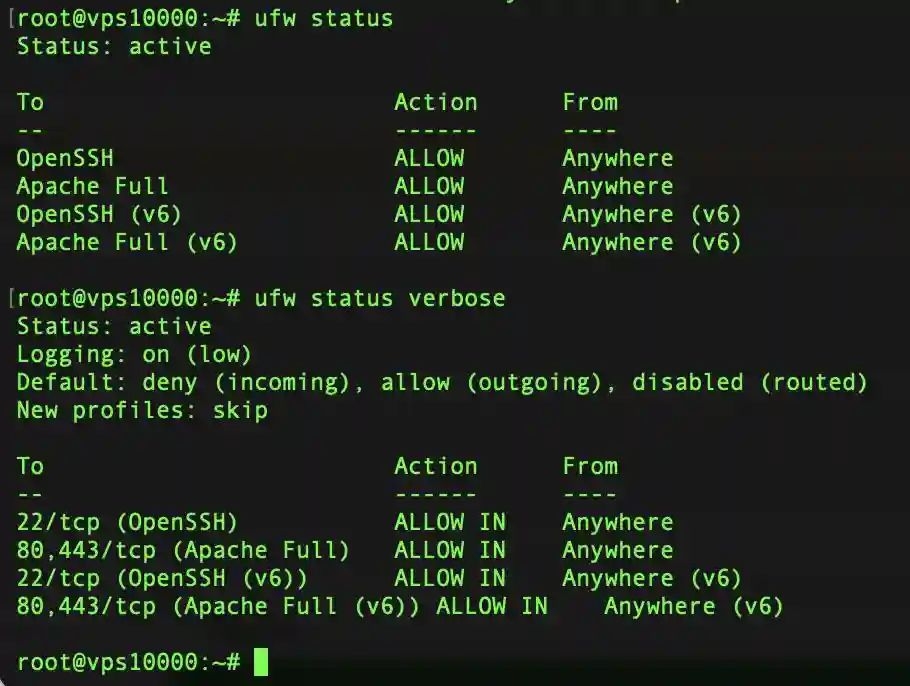
A successful script exit is not enough. Verify the important controls independently.
Check the firewall:
sudo ufw status verboseCheck Fail2ban, if installed and configured:
sudo fail2ban-client statusCheck which SSH port the daemon is configured to use:
sudo sshd -T | grep -E '^(port|permitrootlogin|passwordauthentication|pubkeyauthentication)'The effective configuration should match your intended policy. For example, you generally want SSH key authentication enabled and root password-based login disabled.
Be aware that disabling password authentication can affect other users or automation that still depends on passwords. Review those dependencies before applying the change.
If Docker is installed, verify that container networking behaves as intended. Published container ports can interact with firewall rules in ways that are not obvious from the UFW status alone. Test access from another machine rather than assuming UFW automatically blocks every container-published port.
Common Mistake or Troubleshooting

Mistake 1: Changing SSH before opening the new port
If the provider firewall blocks the new port, you may lose remote access. Add the network rule first.
Mistake 2: Closing the only working SSH session
Always test the new connection in a second terminal. Keep console or rescue access available until the migration succeeds.
Mistake 3: Assuming a different SSH port is sufficient security
A nonstandard port can reduce routine scanning noise, but it does not replace SSH keys, a firewall, updates, or brute-force protection.
Mistake 4: Assuming UFW controls all Docker traffic
Docker may configure packet-filtering rules directly. Review the project’s Docker handling and test actual external reachability.
Mistake 5: Running the same script twice without checking its behavior
A second run may be harmless, or it may alter existing users, ports, firewall rules, or configuration files. Confirm whether the script is designed to be safely repeatable.
Secure First, Install Later
A new VPS should not be treated as a blank machine ready for immediate application deployment. Start by reducing exposure, establishing a reliable administrative account, configuring authentication and firewall rules, and verifying that you can still reach the server.
A script such as vps-security-hardening can make that process more consistent and reduce repetitive manual work. But automation does not remove the need to inspect the code, understand the changes, and test the result.
Harden the server first. Install your applications second. That simple order gives every project you deploy on the VPS a safer starting point.