Windows 11 updates can be useful, especially when they fix security problems or hardware bugs. But there are situations where automatic updates become frustrating.
I have seen this happen during real development work: a Windows update downloads in the background, the computer decides a restart is required, and suddenly a carefully configured development environment is interrupted. Sometimes a driver changes after an update. Sometimes a feature update changes a setting you were relying on. And on slower or limited internet connections, Windows Update can consume bandwidth at exactly the wrong time.
The problem is that Windows 11 is designed to update automatically. Microsoft does not provide a simple “Never Update Again” switch for most users.
However, you can significantly reduce or stop automatic updates by changing the Windows Update service and related settings.
This guide explains the practical options, starting with the most straightforward method.
Important: Completely disabling updates permanently can expose your PC to security vulnerabilities. If this computer connects to the internet regularly, consider disabling automatic updates only temporarily or manually checking for important security updates.
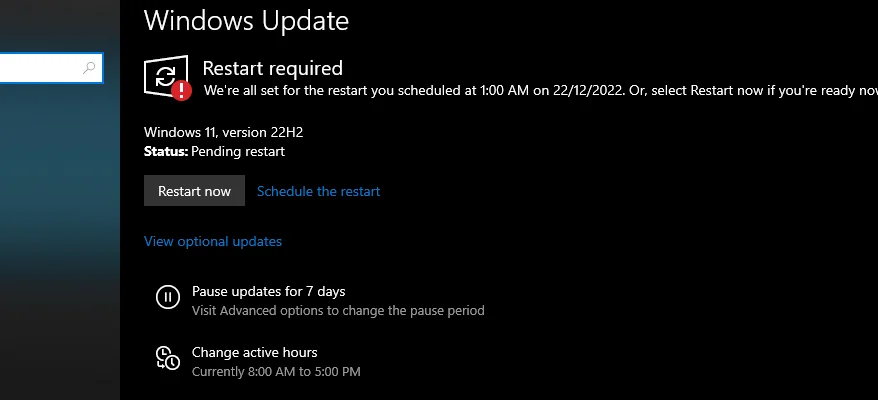
Method 1: Disable the Windows Update Service
The Windows Update service is responsible for downloading and managing many Windows updates.
Stopping and disabling this service is one of the most direct ways to prevent automatic updates.
Step 1: Open Windows Services
Press:
Windows + RType:
services.mscThen press Enter.
You can also search for:
Servicesfrom the Windows Start menu.
Step 2: Find Windows Update
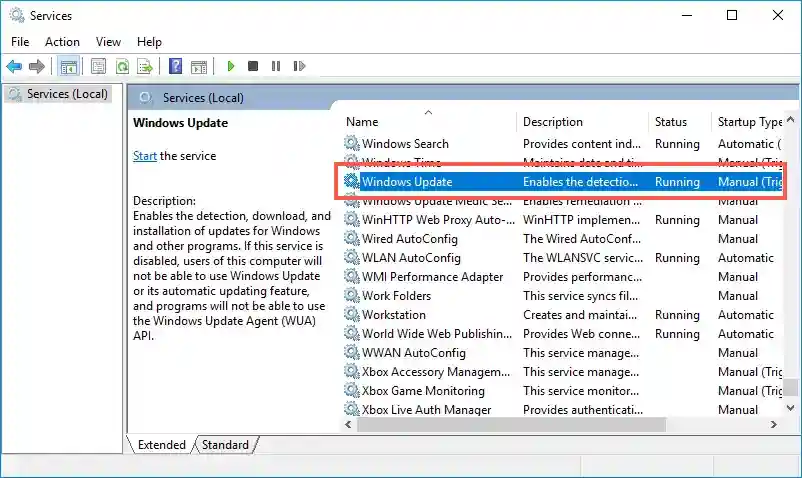
Scroll down until you find:
Windows UpdateDouble-click it.
Step 3: Stop the Service
If the service is currently running, click:
StopWait until the service status changes.
Step 4: Change the Startup Type
Find:
Startup typeChange it to:
DisabledThen click:
ApplyFinally, click:
OKRestart your computer.
How to restore Windows Update later
Return to:
Services > Windows UpdateChange:
Startup type: Disabledback to:
Manualor:
AutomaticThen start the service again.
Method 2: Pause Windows Updates
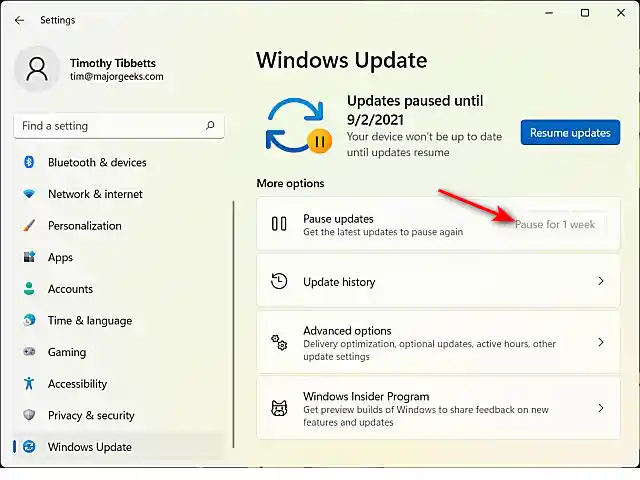
If you don’t want to permanently change Windows services, Windows 11 includes a built-in pause option.
Go to:
Settings > Windows UpdateLook for:
Pause updatesWindows allows updates to be paused for a limited period.
This is the safest option if your main problem is timing.
For example, you might pause updates before:
- A business presentation
- An important project deadline
- A long video rendering job
- Software testing
- Traveling with limited internet access
The limitation is obvious: Windows will eventually require updates to resume.
So this method is useful for temporary control, not permanent prevention.
Method 3: Use a Metered Connection
Windows treats metered internet connections differently.
When a network is marked as metered, Windows may reduce automatic downloading of some updates.
Go to:
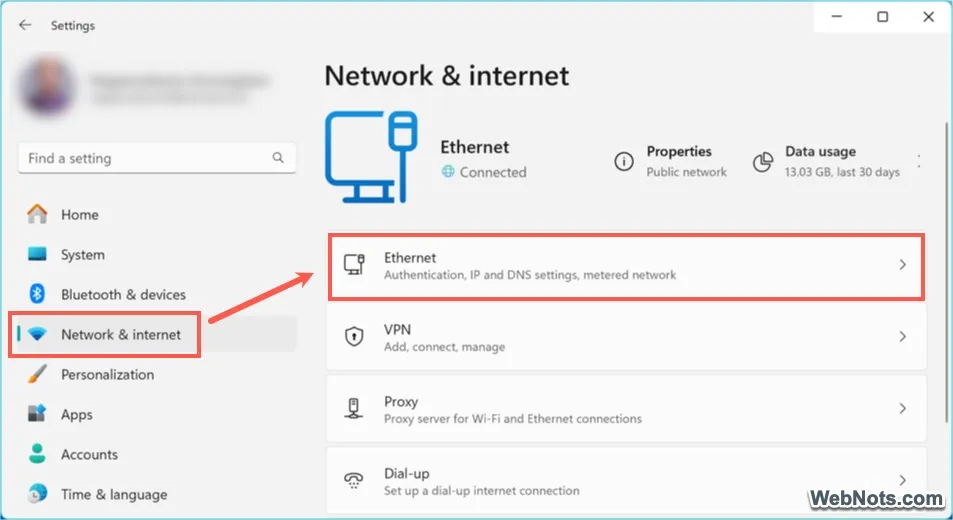
Settings > Network & internetSelect your current connection.
For Wi-Fi, use:
Settings > Network & internet > Wi-Fi > Your NetworkThen enable:
Metered connectionFor Ethernet connections, go to:
Settings > Network & internet > EthernetThen enable the metered connection option.
Why this works
Windows assumes that a metered connection may have:
- Limited mobile data
- Data charges
- Bandwidth restrictions
As a result, Windows generally becomes more conservative about downloading large updates automatically.
However, this method does not guarantee that every Windows update will be blocked.
Important security updates may still behave differently.
Method 4: Use Group Policy Editor
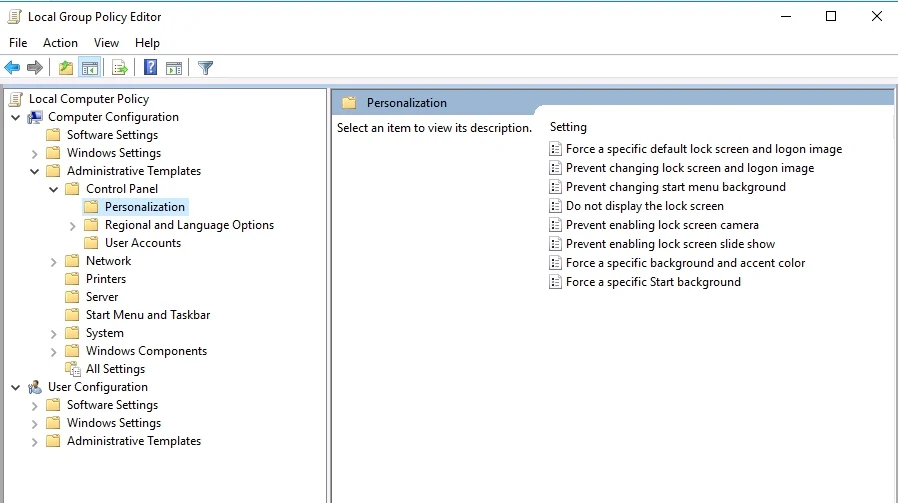
This option is mainly useful for Windows 11 Pro, Enterprise, and Education editions.
Windows 11 Home normally does not include the Local Group Policy Editor by default.
Press:
Windows + RThen type:
gpedit.mscNavigate to:
Computer Configuration
> Administrative Templates
> Windows Components
> Windows Update
> Manage end user experience
Look for:
Configure Automatic UpdatesDouble-click it.
You can change the policy configuration depending on how much control you want.
A practical option is:
Enabledand then select a configuration that requires notification before downloading or installing updates.
This is often better than completely disabling updates because you still control when updates happen.
After making changes, you can restart your computer or run the following command in an elevated Command Prompt:
gpupdate /forceWhy I prefer this method for advanced users
For development computers, I generally prefer controlling update behavior rather than trying to permanently remove Windows Update from the system.
That way, Windows does not suddenly download a large update, but you can still install important patches when you’re ready.
Method 5: Disable Automatic Update Tasks
Windows Update does not rely on a single process.
This is where many users run into trouble.
They disable the Windows Update service, restart the computer, and later discover that Windows Update appears to be active again.
Windows includes scheduled tasks and system components related to update maintenance.
Open:
Task SchedulerYou can search for it from the Start menu.
Then review:
Task Scheduler Library
> Microsoft
> Windows
> WindowsUpdate
Depending on your Windows version, you may see update-related tasks.
Be careful when changing scheduled tasks.
Disabling random Microsoft system tasks without understanding their purpose can create unexpected problems.
If your goal is simply to stop automatic downloads, changing the Windows Update policy is usually safer than disabling every update-related task you can find.
Method 6: Set Update Services to Manual Control
A balanced approach is to stop Windows from automatically managing updates while keeping the update system available.
Open:
Services > Windows UpdateInstead of choosing:
Disabledyou can use:
ManualThen stop the service.
This approach may be easier to manage than permanently disabling it.
When you want to check for updates:
- Open Settings
- Go to:
Settings > Windows Update- Start the update service again if necessary.
- Check for available updates.
- Install updates at a convenient time.
For many users, this gives a better balance between control and security.
Why Windows Update Sometimes Turns Back On
A common complaint is:
“I disabled Windows Update, but it started again.”
This can happen because Windows 11 has several components involved in update management.
These can include:
- Windows Update services
- Update orchestration components
- Scheduled maintenance
- Feature update mechanisms
- Security components
A major Windows upgrade can also restore certain default settings.
This is why there is no single method that guarantees every version of Windows 11 will remain permanently frozen forever.
Microsoft actively develops Windows Update, and update behavior can change between Windows versions.
A Safer Setup for Most Windows 11 Users
Instead of trying to block every update forever, I recommend a controlled update strategy.
Use these settings:
1. Set Windows Update to manual control
Use:
Services > Windows UpdateChoose:
Manual2. Enable a metered connection
Use:
Settings > Network & internet > Wi-Fi > Your Network > Metered connection3. Use Group Policy if available
For Windows 11 Pro:
Computer Configuration
> Administrative Templates
> Windows Components
> Windows Update
> Manage end user experience
> Configure Automatic Updates
Configure notifications instead of automatic installation.
4. Check for updates manually
Create your own schedule.
For example:
Once per monthor:
After major projects are completedBefore installing updates, make sure important files are backed up.
This gives you control without leaving the computer permanently unpatched.
How to Check Whether Windows Update Is Disabled
Go to:
Settings > Windows UpdateCheck whether Windows is downloading updates automatically.
You can also open:
Services > Windows UpdateLook at:
Service statusIf it shows:
Stoppedthe service is currently not running.
Also check:
Startup typeIf you selected:
DisabledWindows should not normally start the service through the standard service manager.
However, remember that Windows feature updates or system maintenance can sometimes change update-related behavior.
Common Mistakes and Troubleshooting
Mistake 1: Disabling updates but forgetting to restart
Some changes do not fully take effect until after a restart.
If Windows Update still appears active, restart the PC and check again.
Mistake 2: Disabling every Microsoft service
Don’t disable services randomly.
Windows has many interconnected components, and disabling the wrong service can affect:
- Microsoft Store
- Driver updates
- Security features
- Windows recovery
- System maintenance
Change only the services and settings you understand.
Mistake 3: Using an unofficial “Windows Update blocker”
There are many third-party tools that promise to disable updates permanently.
The problem is that these tools often modify:
- Registry settings
- Services
- Scheduled tasks
- System permissions
A poorly designed tool can make troubleshooting much harder later.
If possible, use Windows’ built-in controls first.
Mistake 4: Forgetting about security updates
Stopping feature updates may be convenient.
Ignoring security updates for a long time is different.
If your computer is used for:
- Online banking
- Work accounts
- Web browsing
- Cloud services
consider manually installing important security updates regularly.
Mistake 5: Expecting one method to work forever
Windows 11 changes.
A method that works perfectly today may behave differently after a major feature update.
If you want maximum control, check your update settings after major Windows upgrades.
Final Thoughts
You can reduce or stop Windows 11 automatic updates, but there is no perfect one-click method that guarantees Windows will never update again under every future Windows version.
For the strongest basic control, disable the Windows Update service.
For a safer long-term setup, combine:
- Manual Windows Update service control
- Metered connections
- Group Policy settings
- Manual update checks
For most people, that is a better solution than permanently blocking every update.
You stay in control of when updates happen while still having the option to install security fixes when you decide the time is right.
If you’re using your Windows 11 computer for development, content creation, or important work, the best approach is usually not to eliminate updates completely.
It’s to make sure Windows updates when you are ready—not in the middle of something important.